
5 Steps From Dreaming to Done!
Mar 16, 2021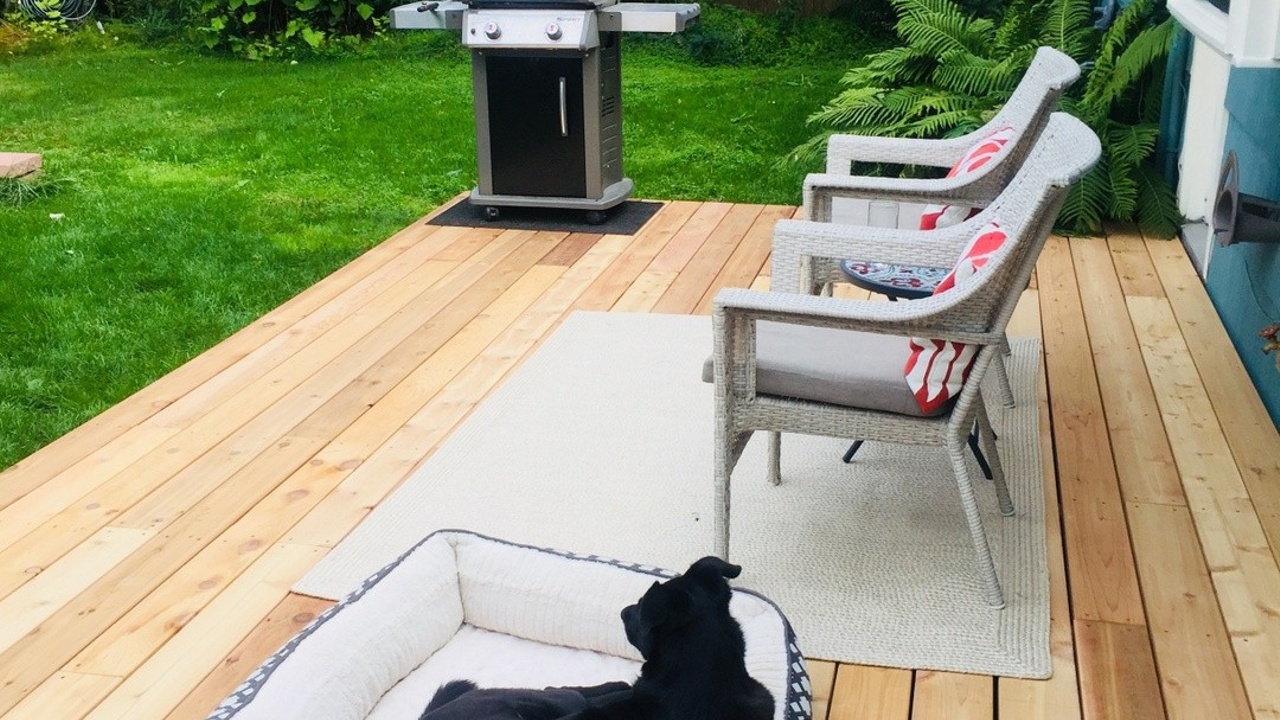
“First comes thought; then organization of that thought, into ideas and plans; then transformation of those plans into reality. The beginning, as you will observe, is in your imagination.” ~ Napoleon Hill
When I bought my first house and moved in about 4 years ago, I didn’t know it at the time, but I was about to embark on a journey that would fulfill me in more ways that I ever could have imagined. I was about to be in a place where whatever I wanted to create in my home space, I had license to do. I remember the very first improvement I made to my house. It was a sink faucet. At the house inspection, it was discovered that the existing kitchen sink did not have an appropriate venting mechanism and therefore, a new fixture was needed. Because I was overly eager to please the sellers I offered to buy a new sink faucet and pay to have it installed. I don’t recommend that people do things like this before a house is actually theirs, but the prospect of picking out my very own fixture for the first time in my whole life was like crack to me. At 40 years old, I’d lived in many rentals and I’d never had any nice new…anything in a house I’d rented. It seemed to me that landlords went out of their way to install the cheapest, most basic appliances, sink faucets, shower fixtures, you name it. No, this was going to be MY house, and I was going to have a NICE sink faucet. Anyhow, I digress. The point is when the heart desires something, it desires it and there is not a lot you can do to reign in what it wants. So…off I went to home depot to pick out the nicest, most elegant, swan necked kitchen sink faucet in MOEN brushed nickel that I could find. It was probably the most expensive one and it was beautiful. Since this was my first technical “home remodel” project, I hadn’t yet gotten accustomed to doing some online research beforehand, a ritual I rarely pass up these days. Also, since the house wasn’t technically mine yet I had to hire a plumber to actually come and install it, which I cheerfully did, showing up with my newly purchased beautiful sink faucet in hand and hung around (probably being super annoying) while he installed it and fixed the sink venting issue. Where am I going with all this? I’m so glad you asked, well this story is a simple example of a process that I unknowingly employed when I bought my house 4 years ago, and have replicated many times since then with each successive project that I’ve done. This is the 5 step process that I use to get from beginning to end for each project I do and it has never failed me, not once. With this process I built a beautiful front yard fence with gorgeous cedar gate in my front yard and a modern privacy fence in my back yard. I’ve built two beautiful 20’x20’ cedar decks in the front and back of my house to capitalize on sun worshiping, lounging, margarita and g&t drinking, party throwing and general “living the dream” scenarios. I’ve completely gutted and remodeled my bathroom. I’ve ripped up all the old carpet in my house and installed beautiful Burbank oak luxury vinyl plank flooring, which is waterproof and scratch resistant so my fur babies can run around the house unfettered. I’ve built my own beautiful douglas fir shelves for my two bedrooms. Instead of replacing my outdated, dark and dingy fireplace stone tile I whitewashed it, giving it a complete facelift for about $40 and saving myself hundreds of dollars and many hours of painstaking and messy tile replacement labor in the process. Okay, are you ready for this. Here it is, my tried and true 5 step process for completing any DIY home remodel project:
Step One: Everyone’s Gotta Have a Dream
If you can dream it, you can achieve it. This step, the dreaming step, is by far the most important. The act of simply visioning the thing you want to create is a powerful force and most times, it will see you through to project completion and beyond. I’m a proponent of visiting your dream vision as often as you can in your mind throughout your project timeframe. When I was working on both of my cedar decks, I would spend a good 10 minutes in the morning most days, just staring at the space where my deck would go. As each day went by and I got a little farther along, I could better imagine what the finished project would look like and the more pleasure I got out of staring at the space, drinking my morning coffee and getting excited thinking about how nice it was going to be sitting in the sunshine, or picking out the perfect patio furniture at Target when it was done. Sometimes the dream is something that you’ve always wanted to have, like a dream kitchen or a beautiful cedar deck. Sometimes the dream is something that you haven’t really thought about before, but it is something that needs replacing in your home, like a kitchen faucet. Wherever the idea comes from it doesn’t matter, once it is firmly planted in your mind, it’s there and it won’t be going away until you get it done.
Step Two: Vision Boarding
This may seem like a repeat of step one, but I assure you, it’s not. Vision boarding, the practice of creating a board (either with posterboard or digitally) is one of the best ways to get clear on what you are trying to create, what you want it to look like, and what materials you might need to create it. I get asked a lot, how do you know what you want your project to look like? A good example of this is bathroom remodeling. Have you ever strolled down the tile aisle at your local hardware store. There are a LOT of choices. How does a person choose which tiles they should use in a bathroom remodel? “How can I pick out tile? I don’t even know what I want my new bathroom to look like. “THIS is where vision boarding is indispensable. Most of the time we DO know what we want our new bathroom to look like. We just don’t KNOW that we know. Vision boarding helps us figure out what we don’t know that we actually already know. The steps are simple:
- Get on Houzz or Pinterest or Google and search for photos of “bathroom remodel” scroll through photos of beautiful bathrooms until you see one that you like.
- Drag and drop this photo into a new folder on your desktop that you’ve previously labeled “bathroom”
- Repeat steps one and two until you have at least 20 or more photos of bathrooms that you like.
- Now, click on your folder and start going through the photos.
- Look for similarities between the photos. You will be amazed to see that there are quite a few similarities between the photos you’ve chosen. They could include a similar type of tile, a combination of materials such as tile, wood, and plants, or a style like modern farmhouse, industrial or vintage.
- Once you’ve identified a distinct style or look that you are going for, pick apart the photos to dial in on different elements. For example, when I was remodeling my bathroom I knew that I wanted to install at least one shower niche. Because I’d never installed a shower niche, I also searched for photos of shower niches by themselves to find a style that I liked.
- Now, go through the photos again and pick out 10 or more of your very favorites and either print them out as a 5x7 size or put them into a Microsoft Powerpoint slide. Another handy free software for creating a nice poster is Canva. Or be old school and print the photos out on a color printer, cut them out and glue them to a big piece of posterboard.
- Once you’ve assembled your vision board, hang it somewhere that you will walk by it or see it every day.
The simple act of seeing your vision board every day will trigger your subconscious to not only think about and start obsessing over your project, but will also enable you to spot the exact materials you want to buy in the store without even knowing it. When I first moved into my house I made a vision board made up of various different projects that inspired me. One of the photos on my vision board was of a cool breakfast nook/dining space. One day, a couple of years later, I knew I wanted to buy some comfortable dining chairs so my dinner party guests could sit comfortably around the table and enjoy the meal, spending lots of time talking into the evening. I happened to stop by Pier One and saw these fabulous chairs. They were perfect. I bought two and brought them home. The next morning I was enjoying sitting in one and glanced up at my vision board, which I’d hung on a wall in the dining room. In the photo that I’d
put on the wall a couple years earlier was a chair just like the one I was sitting on now. Same chair, same style, same color. Like magic. I’d seen the chair, and my subconscious brain had remembered it and in my conscious mind, I knew I had to buy it. That’s the power of a vision board. And it really does work for everything!
Step Three: Youtube, youtube, youtube
You know what? I’ve heard lots of women complain about how time-consuming searching through youtube videos is when you are trying to figure out how to do a home remodeling project. And believe me, I know. I’ve done more youtube deep dives than I care to remember. Some of them great, some of them not so great. But listen, there really is no better way to learn how to do something than to watch other people actually doing it. The key is, don’t spend too much time on one particular video right away. The thing about home remodel projects is there are usually 101 different ways to approach the same project. Everyone has “their” way and its always the best way. What you want to do to keep watching videos until you start seeing the same things repeated. You know you’ve watched enough videos when you are seeing people do roughly the same things, maybe slightly different but following similar steps. A good way to avoid going down the rabbit hole of youtubery is learning to be leary of when I’m youtubing is videos that are longer than 5 or 6 minutes. Most projects can be explained in a video in that time or less and you don’t want to get sucked in by a youtuber who likes to blather on about this and that, wasting your time and making you frustrated. I’m always watching for tubers that get right to it. The best videos are relatively short, well lit, have good sound and show you how to do something in a simple, step by step process. Don’t waste your time with long and drawn out videos. Chances are, a person who has not bothered to condense their video down into an easily digestible 5 to 6 minutes is probably not who you want to be watching. Pros are pros for a reason. They’ve got a method and they are good at explaining it and don’t waste time showing you how to do something.
Step Four: Plan
“A goal without a plan is just a wish.” ~ Antoine de Saint-Exupery
Plans are important for a few reasons. Mostly, if you have a plan for your project, you are less likely to give up, move on to something else, get frustrated, get sidetracked, or get derailed when shit happens as it’s wan to do. So what should you plan? This is where the youtubing comes in real handy. In most of the videos you just suffered through, you learned some really important things.
- What tools you will most likely need for the project.
- What types of materials you will have to buy for your project.
- The basic steps to doing your particular project.
- A rough estimate of how long this particular project might take you to complete.
So here is how making a plan will help you.
First, you need to assess what tools you already own versus which tools you may have to go out and buy or rent. Secondly, if you do have to buy some new tools, part of making your plan will be researching how much those tools cost and if you can afford them now, or need to wait till you have saved up to buy them. Same goes for materials. One thing that I like to do, especially if a project involves buying more expensive tools or materials, like cedar decking boards for building a deck, is buy my materials in phases. That way I can plan on completing my project (say pulling up my carpet and laying down some beautiful luxury plan vinyl flooring in my living room) over my next 3 day weekend maybe a month or two away. In the mean time, I’ll go down to Lowes or Home Depot and buy $200 worth of flooring each payday and by the time that 3 day weekend arrives, I’ll have all the materials and tools I need, and can start my project right after my morning coffee, relaxed in the knowledge that I won’t need to be running to the store half way through, or drop a huge amount of cash right before that 3 day weekend.
Once you’ve got all the materials and tools you will need to complete the project, and maybe the day of or night before you are ready to begin, watch your top 3 favorite youtube videos again, taking some notes if you want but just getting really comfortable with the steps laid out in the videos and making one last check to see that you have everything you need. Clear your schedule so you can focus, at least for a few hours at a time on doing and completing your project. (make this more organized, distil into 3 or 4 steps)
Step Five: Go!
Now that you’ve dreamed your project, you’ve vision boarded the heck out of it, you’ve youtubed it like a crazy person to find out essential tools, materials, techniques and timeframes, and you’ve planned out the purchase or rental of essential tools, materials and scheduled in the time to work on your project and cleared your calendar, you are ready to begin.
One of my favorite things to do while I’m working on a remodel project is listen to audio books. Once you have the general steps of a project down, you are probably going to be repeating those steps to finish your project. This is a great time to tune in to a good audio book and let your hands and body work as you relax into your project zen state.
If you run into snags. There will most likely never be a project that doesn’t present some unique set of challenges or obstacles that you didn’t learn about or were not told about in your research or youtube video. That’s because most of the time, whoever made the video encountered the same obstacle or challenge that you will, but overcame it and by the time they created a video on it, it was no longer a problem for them so they forget to mention it. You will learn each and every challenge as you begin to work. Learn to EXPECT obstacles. Think of every obstacle or challenge as opportunities for you to become a more confident, seasoned home remodeler. Every time you encounter something that throws you off or frustrates you, you will be presented with the opportunity to either give up, or try and figure out what’s happening and how you can work around the issue. Every single time you overcome an obstacle in your home remodeling endeavors, your inner badass will be grinning inside because she knows that particular obstacle will not be a challenge for you anymore. You’ve gained knowledge. You’ve grown your confidence. You’ve expanded. Embrace the hard, it’s a sign you are growing into the badass home remodeler you were always meant to be.
Having written the aforementioned paragraph on running into obstacles, it is worth noting that there are times, when you need to take a break and come back to your project at a later time. There have been times when I was in a hurry and something wasn’t working out right. A good example is the first time I installed luxury plank vinyl flooring. Having decided to save a few dollars at the hardware store and substitute my metal hammer for the recommended rubber mallot that was recommended to be used in floor installation, after all, why would I need to buy a special rubber hammer when I had a good metal one at home, I started to break the edges of my new flooring as I pounded it into place. After this happened a few times, I began to get more frustrated and angry and proceeded to try and force the flooring boards into place, only doing more damage and getting more frustrated and angry with every board I broke. What I needed to do, and eventually did, was STOP, take a deep breath, and walk away. If you find yourself getting angry and frustrated, there is 101% chance that you are missing a step, doing something out of order, using the wrong tool, etc., etc. STOP, take an hour to go grab a snack, watch a movie, come back to it fresh the next morning or in a few hours. Once you’ve had time to relax and rethink things you will be amazed to learn there were maybe a few things you hadn’t tried yet, or had time to google the problem on the internet, or just try things in a new way that work this time that were not working when you were too angry and frustrated to see straight. Trust me on this. Also, once I spent over an hour trying to drill into concrete with a hammer drill I’d just purchased, a constant flurry of expletives coming out of my mouth because no matter how hard I pushed down on the drill I could not make a hole in the concrete, only to discover after I’d thrown the drill down and gone and made myself a sandwich, that I didn’t have the drill on the “hammer” setting and therefore, which is essential to help the drill “hammer” into the concrete. Once I changed the setting on the drill, I was drilling holes in concrete like a BOSS. STOP. Take a deep breath. Ask Yourself if You are not Seeing everything clearly. STUDY the situation. Go have a snack. Try again later.
